Lot's of other silly little jobs too ...
The microwave had to fixed in place . . .

Same as for the fridge . . . use some furniture castors to put the feet in . . .

(this iPhone is terrible in low light - and no flash - you just can't hold it steady enough)
Some more "breeching staples"and a strap over the top should do the job.

Then "accessorise" the bathroom.
All these pieces are held on with "strong" suction caps - it will be interesting to see how well they hold up - but I didn't want to drill holes if it could be avoided. Still, my GPS holds on the motorcycle windscreen with just a suction cap and if that works this should too.


The steps now have their end caps in place and look much neater but they have a slight tendency to slip on the supports with time and traffic.

So the simplest thing I could think of was to put some stops on each end. Some 3mm aluminium strip was cut into pieces and some holes drilled

and then were riveted to each end of the step. That stops them going anywhere!

and they can still be stacked up for storage.

I know I go on and on but really! Back to the hot water system. Water heating up of course expands and the pressure needs to be eased off before it all blows and just in case something goes wrong a safety valve is of course mandatory. If you've ever wondered about how much energy is stored in a boiler you should read some of the old stories of early train boilers blowing up and the damage they did!! There he goes . . . wandering off again . . .
Well in this heater there is a safety/expansion valve - but no place for the water to go - it just leaks through the joins and into the cabin somewhere!! So of course that's another thing that needs fixing - a bit of copper pipe (the water is HOT) with a couple of bends soldered in and a slot cut in the cover
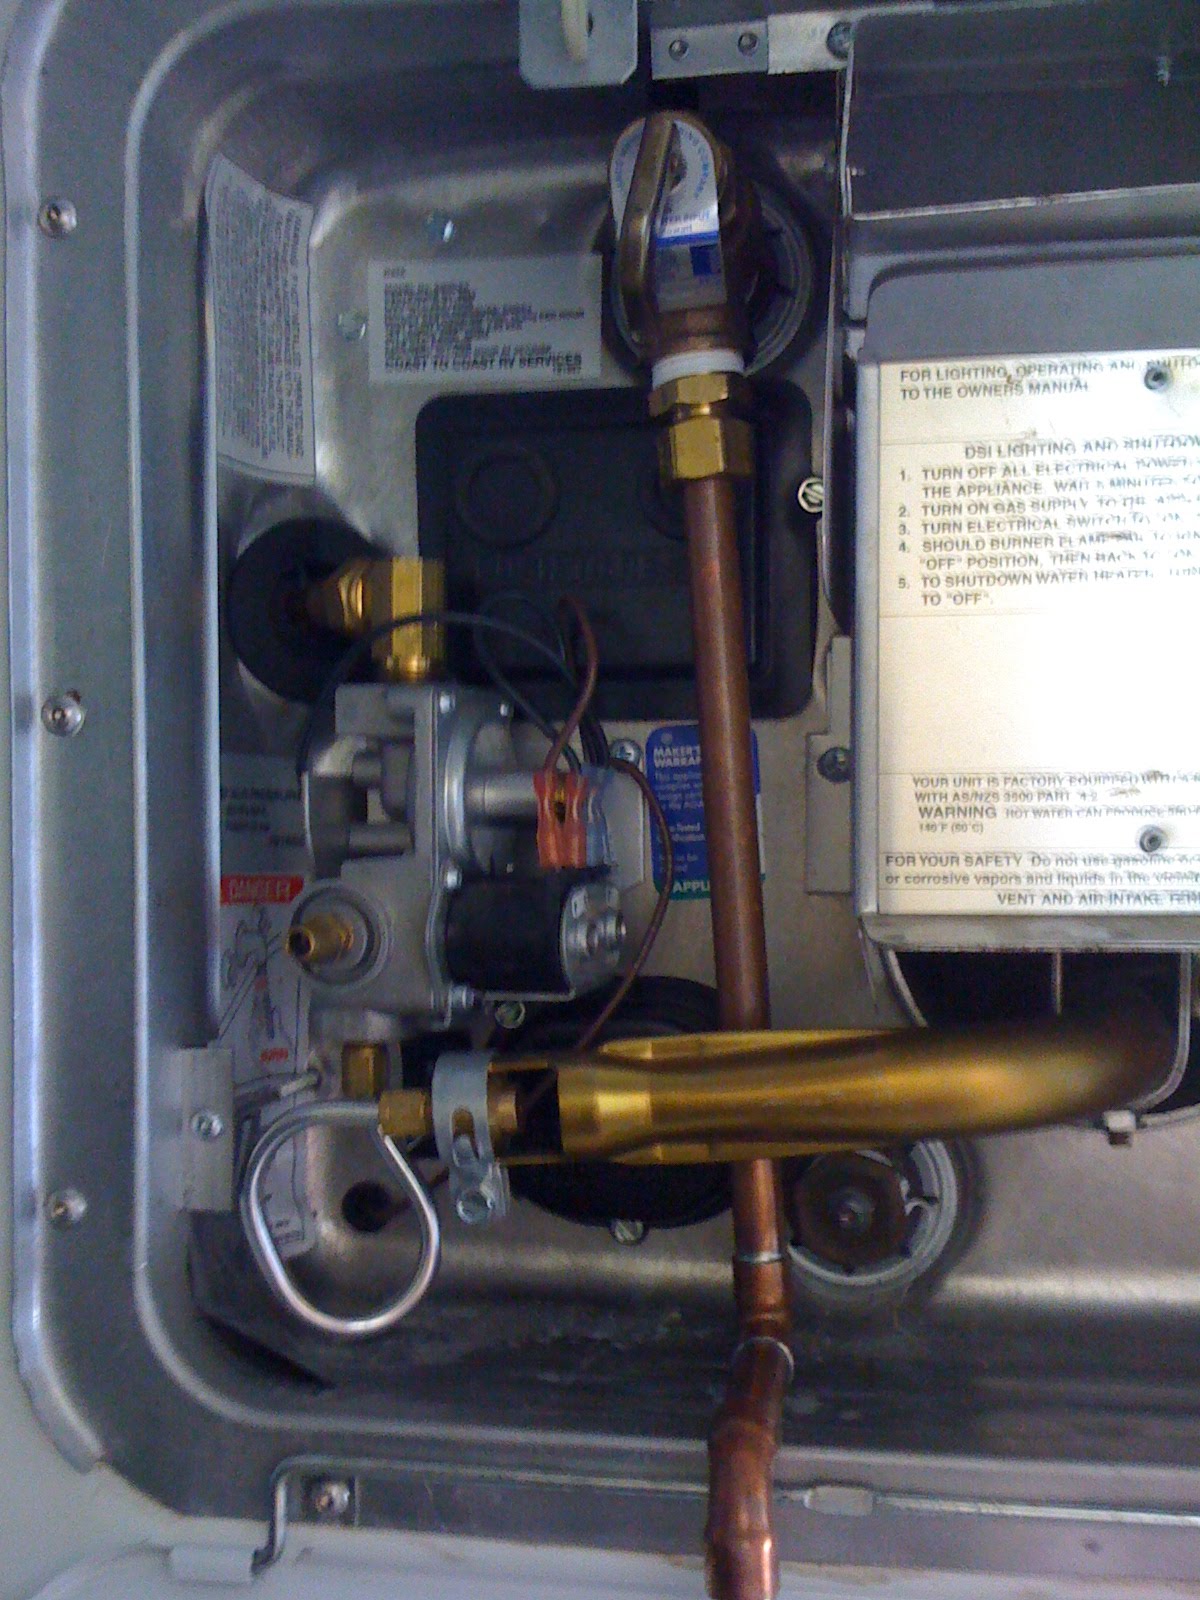
seems to do the job quite nicely

Then of course were those messy wires still hanging around in the kitchen.

I knew I had a bit of ducting lying around somewhere . . . well it's a bit neater anyway.

I also needed another 24Vdc socket for the freezer. I won't repeat my comments about the stupid lugs for these wires - but it took me another 30 mins to rebuild the plug after the lugs broke off.

Still, it was finally in place and the the freezer can be pushed into its place below the "pantry". Just enough room to raise the lid.

Last time I was out in the rain every time I opened the door I got drips down my neck. A gutter seems in order over the top of the door to help divert the drops. Some "J" moulding seems the ideal stuff.

Just to be a bit fancy a bit of rod the same size was put in one end and the assembly in a vice and given a smack with a hammer.

Makes the end turn down a bit and stops the drips running back along the underside.

Then this was riveted and siliconed over the door. (Silicone yet to be tidied up . . .)

Also coming inside in the dark I haven't decided where all the lights will go yet but at least one is needed alongside the door so you don't break your neck trying to get to the kitchen light. A spare LED light I have for testing light output will do nicely for now.

Also found some nice little rubber straps and hooks which can be screwed along the inside wall of the fridge compartment without rubbing on the fridge and are easy to hook onto the slides to stop the fridge rolling out while under way. So now the green straps can go.

Also a 4kg bottle (more portable) for the outside BBQ was fitted into the gas compartment.

.
.
.
Well I can't avoid it any longer.
I have to tackle the motorbike rack.
First thing I need is some holes through the nice, smooth, shiny aluminium . . . somewhere.

The only clue where, is the hole on the inside made for the shaft to go through. Of course it is way to big and awkwardly placed to hope to get a hole through the middle

so a quick jig is in order. Make the plastic the same size as the big hole

and drill from the inside and the hole comes out here

This can then be used as a pilot hole for the hole-saw and it seems to have come out OK.

Of course a stainless fitting, similar to the ones made for all the other holes in the back will need to be made later but for now press on.
A shaft is turned down to fit. A large thread is also machined on the end (now hidden in the hole) in order to pull it up tight and keep it all in place. I sort of wondered about the strength of this but there are two of them 32mm diameter to hold up a 100kg bike and when I jumped up and down on one of them without doing up the nut nothing seemed to move at all so I think they will be sufficient.


1 comment:
Wow, wow, wow!!
I meant to comment on the last two posts but got sidetracked and didn't get back to do so.
I love all these finishing details as they're what really "make" the camper.
As always, thank you for the great posts. I always come away having learned something from my visit. The gift of your time to write about what you're doing and to share your knowledge is most appreciated from this reader.
All the best,
Les
Post a Comment